Warranty
One-Year Limited Warranty
Every Tour Caddy is warranted against defects in materials and workmanship for one year from the date of delivery.
What's covered
A bag that stops working properly through no fault of your own:
- The dispenser mechanism and motor
- The control panel and buttons
- The battery and charging port
- Zippers, hardware and fastenings
- Stitching and structural panels
How we fix it: we replace it
We don't run a repair depot and we're not going to leave you waiting weeks while a bag sits on a bench somewhere. If your Tour Caddy fails within the warranty period, we send you a new one.
We email you a prepaid shipping label, you send the old bag back, and a replacement ships out. We cover shipping in both directions. No repair fee, no restocking fee, no diagnostic charge.
If you'd like the replacement to ship before we receive the original, we'll place a temporary authorization on your card for the price of the bag. It's released the moment your original arrives with us. If the original doesn't arrive within 30 days, the authorization is charged.
Charging cables
Tour Caddy charges with any standard USB-C to USB-C cable — the same kind you already use for a phone or laptop. A cable isn't included in the box.
If you own one of our first-run bags, those charge from a USB-A power source and need a USB-A to USB-C cable. Email us and we'll send you the right one free of charge.
What's not covered
- Significant physical damage. Crushing, tears, impact damage, damage from being run over or dropped from height, or anything that has clearly taken a hit
- Damage from misuse, abuse, modification or unauthorized repair
- Water damage from submersion. Tour Caddy is water resistant and built to live outdoors in rain and heat — it is not waterproof, so don't dunk it
- Normal wear, fading and cosmetic scuffs from ordinary use
- Gradual decline in battery run-time, which is normal for any rechargeable battery
- Loss or theft
How we assess a claim
We inspect every returned bag. If it comes back showing significant physical damage, misuse or submersion rather than a genuine fault, the claim falls outside the warranty. We'll tell you what we found and give you the choice: we'll ship your original bag back to you at no cost, or send a replacement for a $50 fee.
To be clear about the normal case: if your bag simply stopped working, you pay nothing.
What we need from you
- Your order number, or a warranty registration
- A short photo or video showing the problem
One replacement per bag. Replacements carry the remainder of the original one-year period.
Commercial and facility use
Bags in continuous commercial service at a driving range or golf facility are covered for 90 days. A range running a bag all day every day puts a very different load on it than a golfer practicing a few times a week. If you're a facility, get in touch about a program built for that duty cycle.
Register your bag
Register within 30 days of delivery to activate your coverage and get first access to future drops. Registration also means we can reach you if there's ever anything you need to know about your specific production run.
Making a claim
Email team@tourcaddy.co with your order number and a short photo or video of the problem. Average response time is 24 hours. In most cases we can tell straight away whether it's a warranty replacement or something simpler — a charging question, for instance, is usually solved in one reply.
This warranty gives you specific legal rights. You may also have other rights which vary by state.
How to Use Your Tour Caddy
Watch the video above, then use this simple guide as your on-range cheat sheet.
Tour Caddy at a Glance
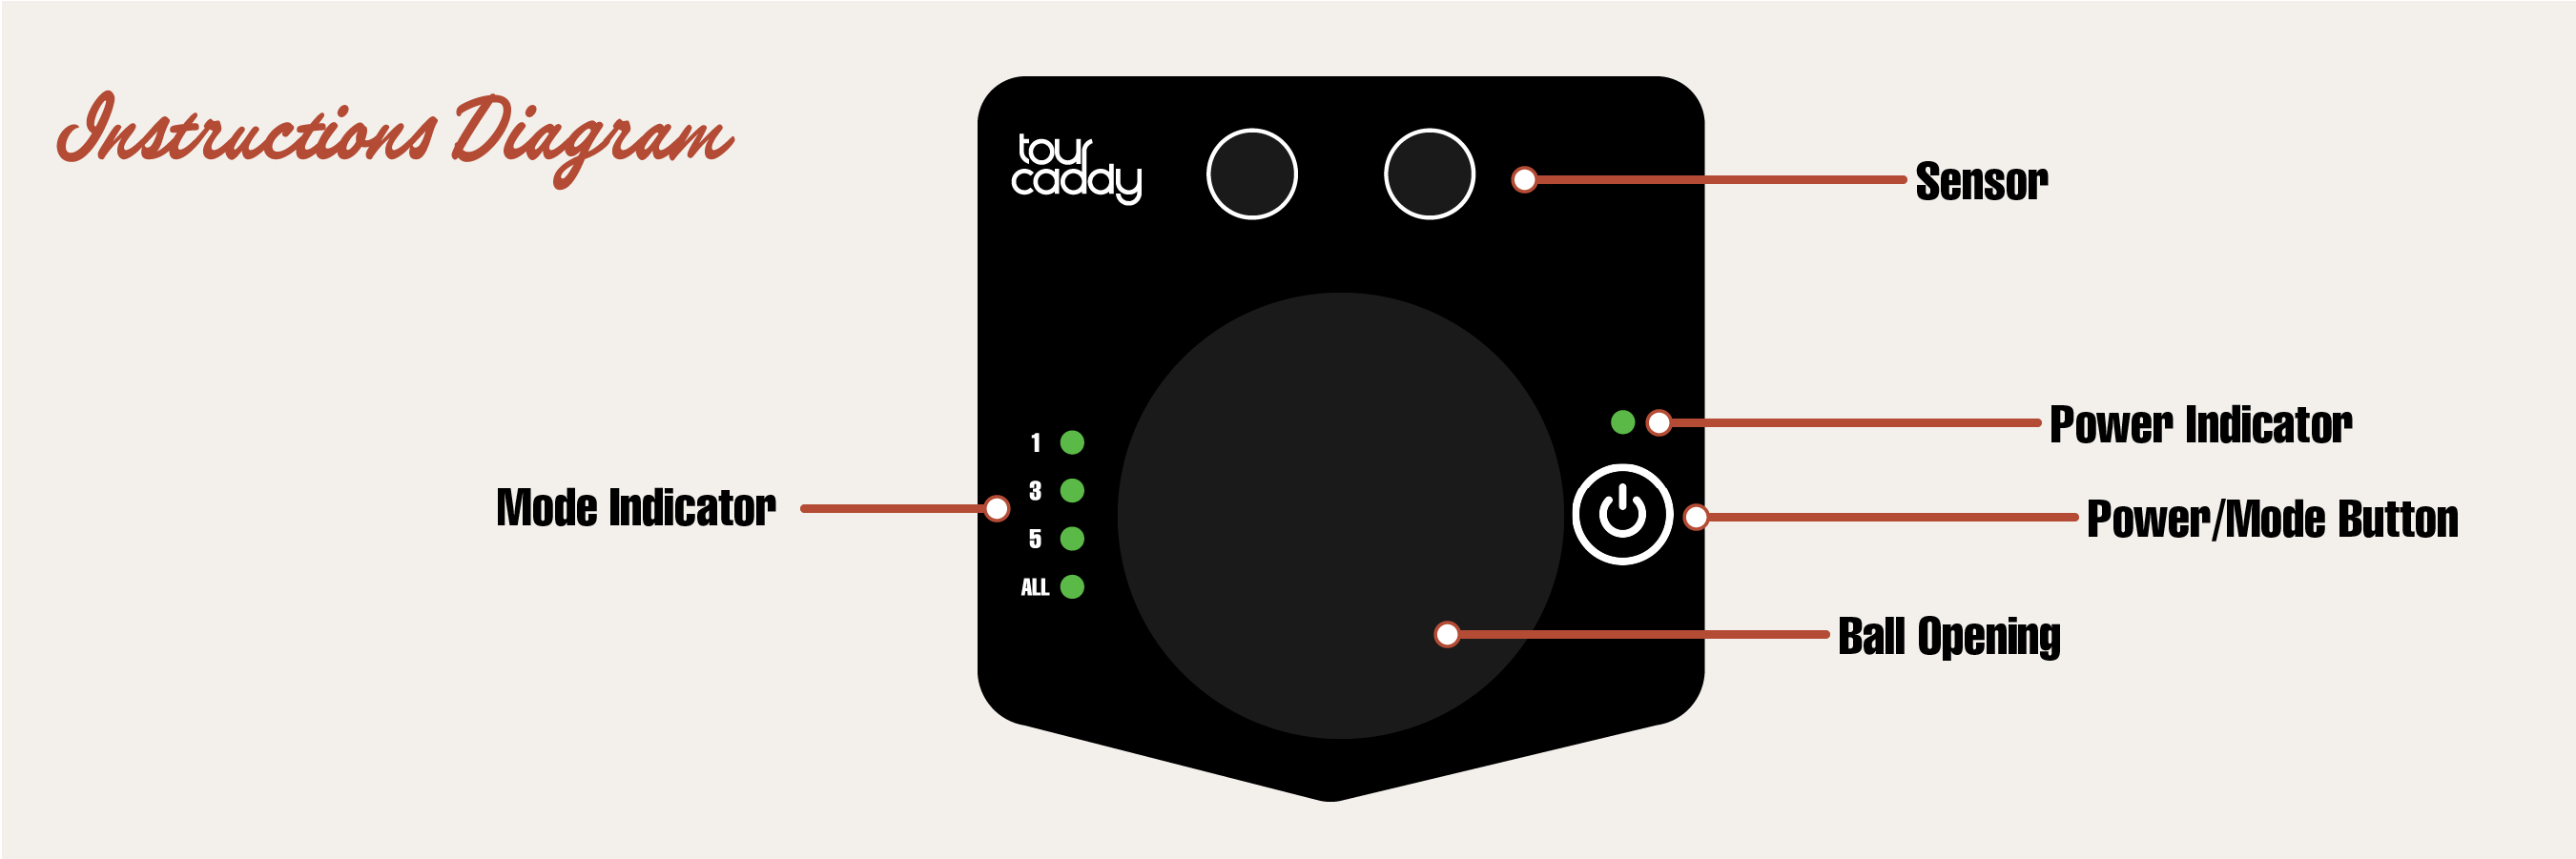
Everything is controlled with one button and a simple set of lights on the front.
- Sensor – Wave your club in front to get balls.
- Ball opening – Where the balls come out.
- Power / Mode button – Turns the unit on and off, and selects how many balls you get.
- Row of 4 lights – Shows your ball mode and a few status alerts.
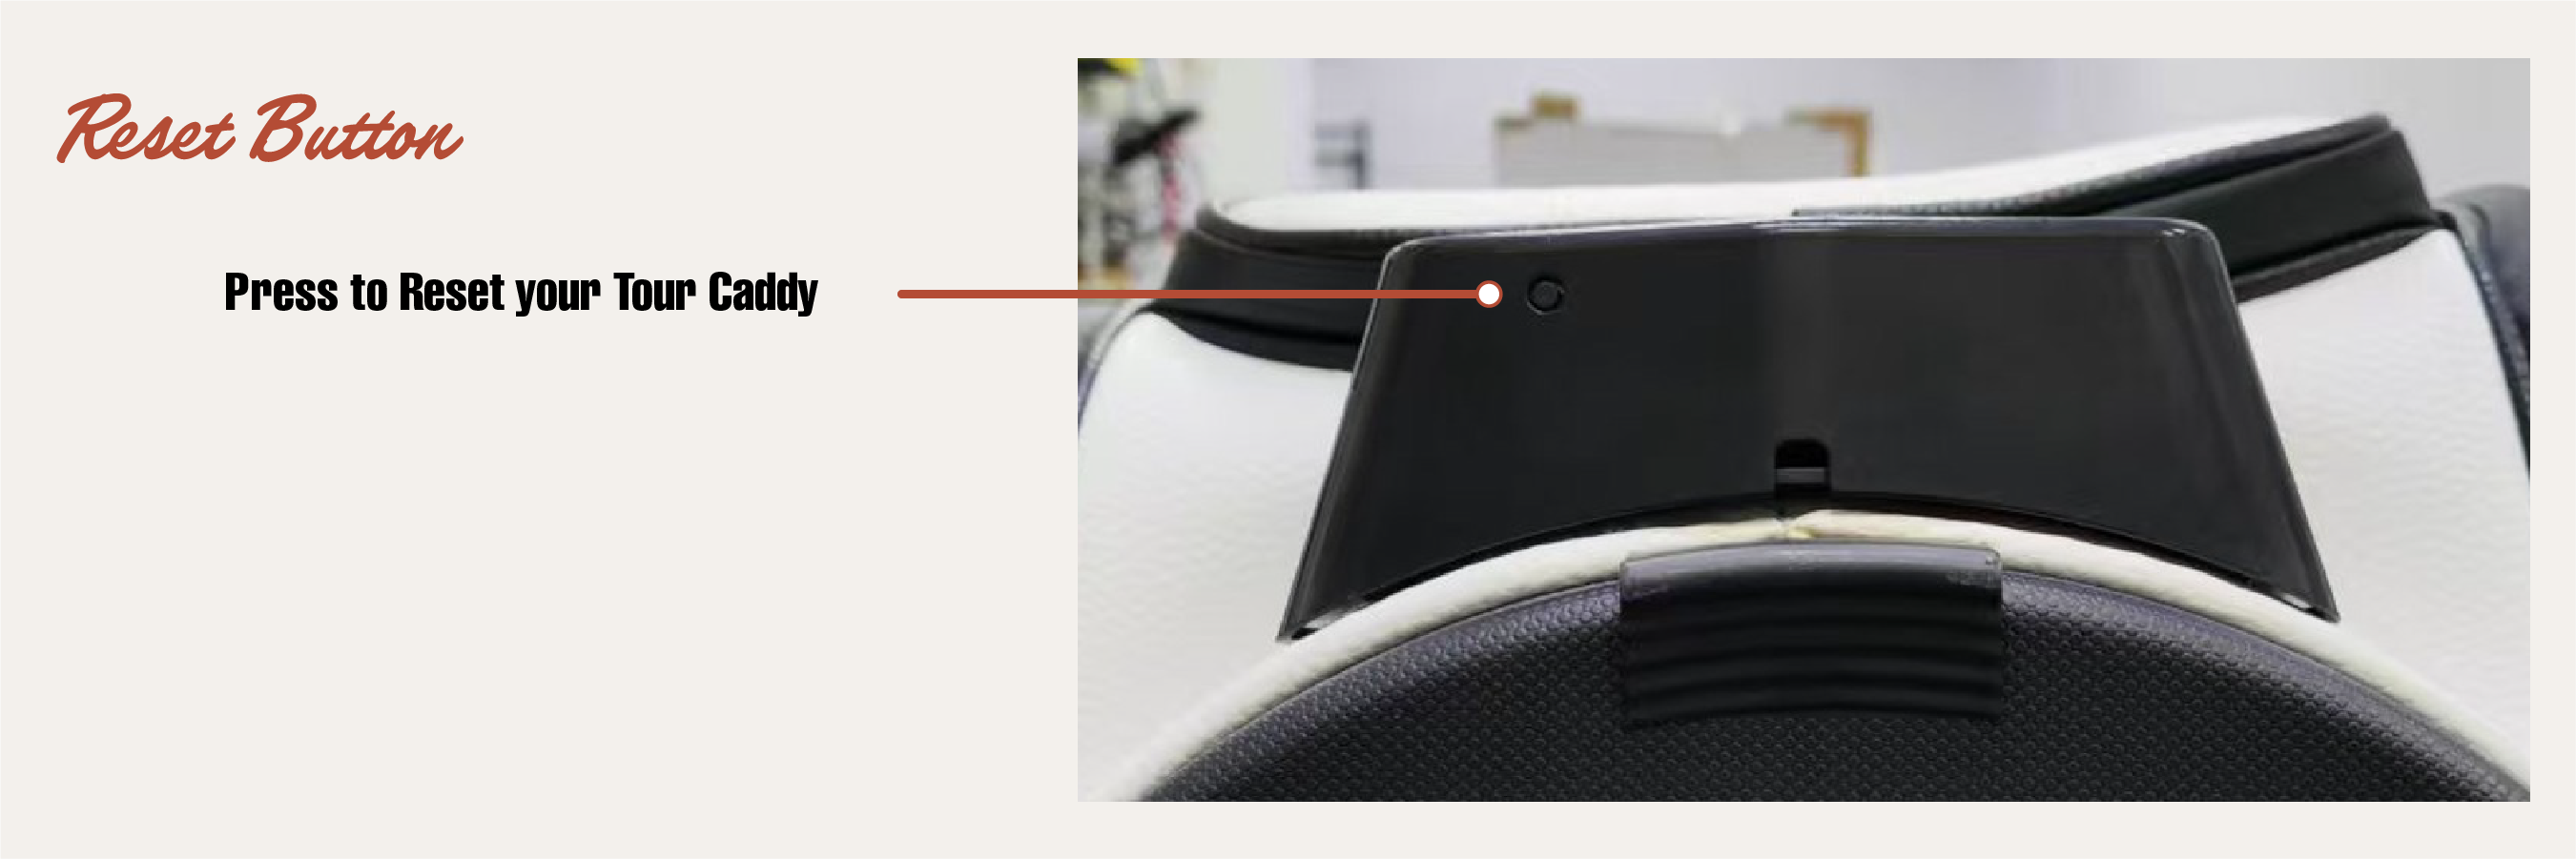
- Reset button – If the unit is acting up, there’s a reset button on the underside of the sensor face.
Quick Start
- Set up your Tour Caddy. Place it in front of your mat and fill it with balls.
- Turn it on. Press the button once. A light will come on to show it’s awake.
- Pick your ball mode. Press the button again to cycle through:
- 1 Ball Mode – For focused, one-at-a-time practice.
- 3 Ball Mode – A small stack ready for faster reps.
- 5 Ball Mode – A bigger pile when you want to rip through a set.
- All Dispense Mode – Hold down the power button until the lights are flashing. This will dispense all golf balls until the unit is empty.
- Confirm your mode. Wave your club in front of the sensor once. The lights will stop “cycling” and settle on the mode you chose.
- Start hitting. Each time you wave your club in front of the sensor, Tour Caddy drops your selected number of balls.
Ball Modes & Lights
The front lights make it easy to see how many balls you’ll get with each wave of the club.
| Ball Mode | What You’ll See | What It Does |
|---|---|---|
| 1 Ball Mode | First light highlighted | Drops 1 ball each time you wave your club. |
| 3 Ball Mode | First 3 lights highlighted | Drops 3 balls for a small pile at your feet. |
| 5 Ball Mode | All 4 lights highlighted (to show maximum mode) | Drops 5 balls for a bigger pile when you’re in a groove. |
| All Dispense Mode | Lights flashing | Dispenses all golf balls until the unit is empty. |
After balls are released, the sensor pauses briefly so it doesn’t keep dropping balls while you’re swinging.
Power & Charging
Turning On & Off
- Turn on: Press the button once. A light will come on.
- Turn off: Click the button to cycle past 5 Ball Mode and it will turn off (keep cycling through the modes).
- Auto sleep: If you forget to turn it off, Tour Caddy will eventually put itself to sleep to save battery.
Charging
- The charging input is inside the front pocket zipper.
- A light will show that it’s charging.
- When it’s fully charged, the light will turn solid.
- Use it unplugged on the range once it’s charged.
Low Battery
- If you see a red or “warning” light when you turn it on, it’s time to charge.
- If it won’t stay on, the battery is too low—charge it fully and try again.
Troubleshooting
- If you’re having trouble, press the reset button on the underside of the sensor face.
Quick Tips
- Wave your club calmly in front of the sensor—no need to swing hard at it.
- Make sure there are always balls in the hopper so Tour Caddy can feed properly.
- Pick 1 Ball Mode when you’re working on precision; use 3 or 5 balls when you’re grooving a feel.